Those early weeks with a baby? The day starts to revolve around the diaper change. One before a nap, one after a feed, one more because “something feels off”… and suddenly you are wondering: How often is enough? Should I wake a sleeping newborn? Why is the skin getting red even though I’m careful?
Between super-absorbent diapers, delicate infant skin, loose stools during diarrhoea, and leaks that appear out of nowhere, these worries are completely valid. A good diaper change routine keeps your baby safe on the surface, protects the skin’s natural skin barrier, and helps you spot when you should check with a paediatrician.
When to do a diaper change (and how often)
Frequency by age: newborns vs 3–12 months
Newborns pass urine very often, and stools can be frequent too (sometimes after every feed). This is expected: the bladder is small, feeds are liquid, and digestion is rapid.
Practical anchors that work for most families:

- Diaper change after every poop (even a small smear).
- Diaper change when the diaper feels heavy, looks very wet, or the skin starts looking shiny or irritated.
From 3 to 12 months, many babies poop less often, but the range is wide. A simple check-in routine is:
- On waking up
- After meals
- Before stepping out
- Before naps
- Before bedtime
Then adjust based on absorbency and, most importantly, what your baby’s skin is “telling” you.
Signs a change is useful (without changing for every drop)
Do you need a diaper change the minute the wetness indicator changes? Not necessarily. But these cues mean “do it soon”:
- The diaper is swollen, puffy, or heavy
- Urine or stool smell is noticeable
- Wetness can be felt from outside
- Early redness, shiny skin, or folds that look pale/whitish from too much moisture
That pale, soggy look is called maceration (skin kept wet for too long). Macerated skin is fragile, add rubbing from a tight diaper or vigorous wiping, and irritant diaper rash can flare quickly.
Before or after feeding: what usually feels best
There is no single right time for a diaper change. Try what suits your baby:
- If your baby spits up easily, changing immediately after a feed can be uncomfortable (pressure on a full tummy). Consider changing before the feed, or waiting 10 to 15 minutes.
- If your baby falls asleep during feeds, changing before can prevent overstimulation later.
- If hunger is intense, a few sips first, then a quick diaper change, then finishing the feed can settle everyone.
Night changes: when to change and when to let baby sleep
At night, sleep matters, and so does skin health.
- Urine only plus a good overnight diaper: often you can avoid waking your baby.
- Poop: try to change promptly. Stool contains digestive enzymes (like lipases and proteases) that can irritate skin when they sit against it for long.
A small trick: keep the lights dim, movements slow, and supplies ready. Less stimulation usually means baby goes back to sleep faster.
Diaper change essentials for calm, safe changes
A simple supplies checklist
Keep the basics in one place so you don’t have to step away mid diaper change:
- Clean diaper
- Fragrance-free wipes, or warm water plus soft cloth/cotton pads
- Changing pad (easy to wipe)
- Disposal bag or diaper pail
- Spare clothes
- Optional: soft towel for pat-drying
If you use any cream, keep the lid closed and out of baby’s reach to reduce contamination.
Diaper sizing: small detail, big difference
Size is not only about weight, it is about fit and movement.
Too small:
- Leaves deep marks
- Increases friction
- Leaks because absorbency is overwhelmed
Too big:
- Gapes at the legs
- Shifts with movement
- Leaks from the sides/back
Signs to size up: persistent marks, tabs stretched to the limit, or repeated leaks despite correct placement.
Disposable vs cloth and “hypoallergenic” options
Disposable diapers are highly absorbent and convenient for nights and travel. Cloth diapers give more control over fabric, but usually need more frequent checks because moisture stays closer to the skin.
If your baby’s skin is reactive, fragrance-free options with fewer added lotions may help. Still, the pillars remain: timely diaper change, good fit, and thorough drying.
Cleaning: wipes vs warm water (and why drying matters)
At home, warm water with cotton pads/reusable cloths can be very gentle. When you are outside, choose alcohol-free, fragrance-free wipes.
After a sticky poop, you may need a wetter clean. Then don’t skip the next step: pat drying, especially in skin folds.
Oil-based cleanser/liniment-style products
Oil-based cleansers can help loosen stool and leave a light protective film. They tend to protect more than they truly clean.
If the area is heavily soiled, clean first with warm water. Then, on fully dry skin, use a thin protective layer if it suits your baby.
Barrier creams and zinc oxide: when to use what
The diaper area faces moisture, friction, urine by-products, and stool enzymes. The goal is to support the skin barrier.
- Healthy skin: nothing is compulsory.
- Mild redness from wetness: a thin barrier layer can help.
- Brighter red, irritated, shiny areas: a more covering zinc oxide paste can be useful.
One common mistake: applying too much. Thick layers can trap moisture and make cleaning harsher at the next diaper change.
Setting up the changing space: clean/dirty zones
Pick a stable, flat surface. Set “clean” items (fresh diaper, clothes) on one side and “dirty” items (wipes, bin/bag) on the other. Place everything within reach.
A strap can help, but it does not replace a steady hand.
Diaper change safety: habits that prevent falls
The most effective rule: one hand on baby
Prepare supplies first. During the diaper change, keep one hand on your baby. Even newborns can surprise you with a sudden push or twist.
Common risky moments
Falls often happen when you turn to grab a diaper, answer the phone, or throw something away. If you must move, take baby with you, even for one step.
Safe alternatives without a changing table
A floor mat is often the safest when you are tired. A firm bed can work if baby is centred. In the car, use a portable mat on the back seat with the vehicle parked.
How to do a diaper change step by step
1) Hand hygiene and prep
Wash hands when possible. Open the clean diaper, keep wipes/water and disposal bag ready so you can keep one hand on baby.
2) Remove the dirty diaper without spreading mess
Open tabs, fold them back, and use the inside of the diaper to lift off the bulk of poop. Keep the dirty diaper under baby’s bottom while cleaning.
A spill-reducer many parents love: slide the clean diaper under baby before removing the dirty one fully.
3) Clean gently (and don’t forget folds)
Clean front to back. Pay attention to groin creases, inner thighs, and the buttock crease. Use fresh wipes/cloth as needed.
Lift the ankles together just enough to raise the hips. Avoid pulling too high.
4) Baby girls: wipe front-to-back
This lowers the chance of transferring bacteria toward the urethra. Clean external folds gently, there is no need to clean inside.
5) Baby boys: expect surprise peeing, don’t retract the foreskin
A sudden pee stream can happen when cool air hits the skin. Briefly cover the penis with a wipe while positioning the clean diaper.
Clean the outside only. Do not forcibly retract the foreskin.
6) Dry: pat, don’t rub
Pat dry with a soft towel. Dry skin means less maceration and fewer redness flares.
7) Apply protection only if needed
Use a thin barrier if the skin is fragile or stools are frequent. Choose zinc oxide paste for more intense irritation.
Avoid powders. Talc is unsafe if inhaled, and corn-starch can worsen certain yeast rashes.
8) Put on the clean diaper: fit checks to prevent leaks
Fasten evenly. Aim for snug, not tight (one to two fingers under the waistband).
Quick checks:
- Waistband level, not too low
- Leg ruffles pulled out (tucked-in cuffs are a common leak cause)
9) Newborn umbilical cord care
Keep the diaper below the cord stump (fold the front down if needed) to prevent rubbing. Keep the stump clean and dry.
Seek medical advice if there is spreading redness, warmth, swelling, foul smell, or discharge.
10) Finish up: disposal + surface hygiene
Bundle the diaper, seal it in the bin/bag, wipe the surface if soiled, and wash hands again, especially after poop.
Newborn diaper change situations parents often notice
Meconium (sticky first stools)
Meconium is thick and sticky and can tempt you to scrub. Instead, use warm water and gentle repeated passes, then pat dry before closing the diaper.
Very sensitive newborn skin
Newborn skin is thinner and more reactive. Water-only cleaning or very gentle fragrance-free wipes often help. Reduce rubbing. Use a barrier product only when redness is present or stools are frequent.
Preventing diaper rash: what actually works
Why diaper rash happens
Most diaper rash is irritant contact dermatitis:
- Moisture weakens the outer skin layer
- Urine alters skin pH
- Stool enzymes irritate
- Friction keeps inflammation going
Diarrhoea, antibiotics, and food changes can make stools more irritating.
Prevention routine
- Diaper change promptly after poop and when diapers are very wet.
- Clean gently, pat dry well.
- Ensure a breathable fit (not too tight).
- Offer short, supervised diaper-free time on a waterproof mat.
Barrier ointment vs zinc oxide paste
- Mild redness with intact skin: thin barrier.
- Brighter red, shiny/weeping areas: zinc oxide paste.
If the rash persists beyond 48 to 72 hours, involves folds with small “satellite” spots (suggestive of Candida/yeast), oozes, crusts, or seems very painful, check with a clinician.
Leaks, blowouts, and discomfort: quick fixes
Too small vs too big (fast recognition)
Too small: deep red marks at thighs/waist, tabs barely reach, leaks even when the diaper isn’t “full.”
Too big: gaps at legs, sagging, shifting, leaks from sides.
Blowouts and clothing removal
For blowouts, undress from the bottom when possible. Many bodysuits have fold-over shoulders so you can pull them down, reducing mess.
Order helps: clean baby first, place clean diaper next, dress last.
Overnight leaks
First improve fit: snug waist, centred diaper, ruffles out. Then consider an overnight diaper or a size up. Tight pyjamas can compress the diaper and cause overflow.
On-the-go diaper change: fast, clean, calm
Minimal kit that covers most outings
- 2 diapers (3 for long trips)
- Wipes/cotton pads
- Small water bottle
- Portable changing mat
- Disposal bags/wet bag
- Hand sanitiser
- One spare outfit
A time-saver: make ready-to-grab “packs” (1 diaper plus wipes plus bag).
Public washrooms: hygiene and safety
Wipe the table, then use your mat. Keep one hand on baby. Avoid placing phones or bags on the changing surface.
When to seek medical advice
Contact a clinician if you see:
- Rash lasting more than 2 to 3 days despite careful diaper change routine
- Blisters, open sores, oozing, crusting, significant pain
- Fever or baby seeming unwell
- Rash spreading beyond the diaper area
- A sudden reaction after switching diaper/wipe/cream brand
À retenir
- A timely diaper change after poop and when the diaper is heavy reduces maceration and rash.
- Night-time: urine-only can often wait if baby is asleep and the diaper is absorbent, poop needs a prompt diaper change.
- Safety first: stable surface, supplies ready, one hand on baby.
- Gentle cleaning plus pat drying plus thin barrier layers support the skin barrier.
- If redness persists or looks unusual, professional support is available.
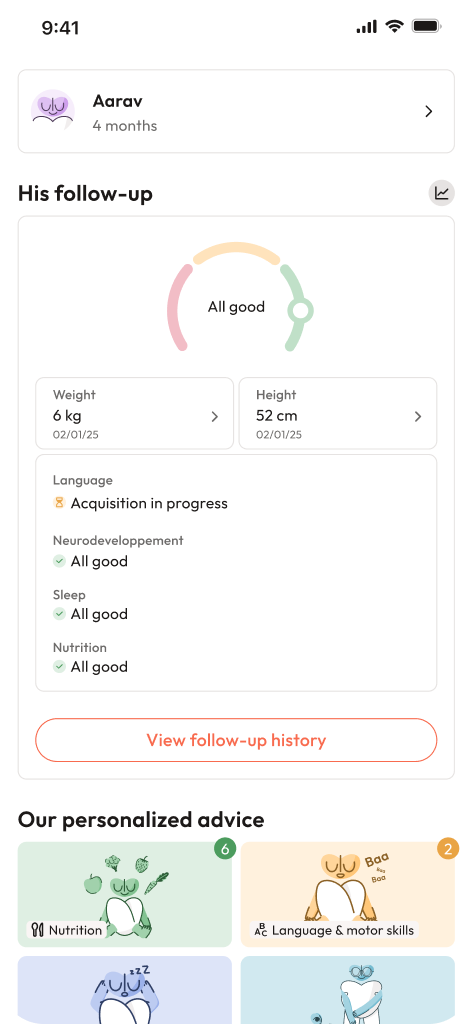
Parents can also download the Heloa app for personalised advice and free child health questionnaires.

Further reading :