A Diaper change can feel like a small job you repeat all day, especially in the first few weeks. Still, it has a big impact on comfort, sleep, and delicate diaper-area skin. Inside a closed diaper, heat and moisture rise quickly. Add stool enzymes, and redness can show up fast, all the more during hot and humid months.
So the usual doubts come up. How often is enough? What is the gentlest way to clean? When does irritation become a proper diaper rash that needs medical attention? Clear steps help, whether you use disposable diapers, cloth nappies, or a mix (common in many Indian homes).
Why diaper changes matter for your baby
Hygiene, comfort, and skin protection
A Diaper change is not only about cleanliness. It protects your baby’s skin barrier (the outer layer that limits water loss and blocks irritants). In a diaper, air flow is limited, temperature goes up, moisture stays trapped. The top skin layer (stratum corneum) becomes over-hydrated, a bit swollen, and more permeable. That means irritants can pass through more easily, and rubbing from elastics or wiping can then inflame the skin.
Regular Diaper change routines reduce:

- contact time with ammonia (formed as urine breaks down),
- exposure to stool digestive enzymes (proteases and lipases),
- maceration (skin weakened by prolonged wetness),
- friction from tight fit or over-vigorous wiping.
Comfort is not a “small thing”. Some babies tolerate wetness quietly, others wake soon after dozing off, stiffen their body, squirm, or refuse to settle. Often it is simply discomfort.
What makes diaper-area skin more fragile: moisture, maceration, friction
Three factors often build on each other:
- prolonged moisture (skin softens),
- maceration in a closed, humid space,
- friction (tight diaper, elastics, repeated rubbing).
Stool is usually more irritating than urine because enzymes and bile salts can inflame skin quickly. That is why even a tiny poop diaper deserves a prompt Diaper change.
Signs you should change right away
Do a quick Diaper change if:
- there is stool (even a small amount),
- there has been a leak,
- the diaper feels heavy, looks swollen, or the wetness indicator changes colour,
- the skin looks hot, shiny-red, or your baby seems suddenly uncomfortable.
Diaper change basics: when and how often
How to tell a diaper change is needed (wet, dirty, discomfort cues)
A Diaper change is usually due when the diaper feels heavy, looks puffy, or the indicator shifts colour. Poop is an automatic change because stool irritates skin more than urine.
Babies also “signal” discomfort:
- sudden fussiness,
- squirming or arching,
- rubbing the diaper area,
- waking soon after falling asleep.
If you notice strong urine smell, repeated leaks, or recurring redness, check earlier. It often points to saturation, fit issues, or irritation.
How often to change (newborns, infants, toddlers, day vs night)
There is no single perfect number. Aim for “often enough to keep skin comfortable and mostly dry” and adjust based on your baby’s skin.
Typical rhythms:
- Newborns (0-2 months): every 2-3 hours while awake and after each poop, often 8-12 changes per day.
- Young infants (0-3 months): diapers fill quickly, visual checks help.
- Infants (3-12 months): often every 3-4 hours in the day, plus after poops. With solids, stool acidity and texture can change, some phases sting more.
- Toddlers: about every 3-4 hours while awake, and whenever there is poop.
Practical timing that helps:
- After poops: always.
- Before a long nap or outing: often more comfortable.
- Around feeds: many babies pee or poop during or soon after feeding. If your baby falls asleep while feeding, changing before can prevent a wake-up, if feeding relaxes your baby, changing after may go smoothly.
- At night: if it is urine only and the skin is healthy, many babies manage in one highly absorbent diaper. For poop, do a prompt Diaper change.
Medical note (hydration clue): after the first week, many babies pass roughly 6-8 wet diapers in 24 hours. A noticeable drop, very dark urine, dry mouth, no tears, or unusual sleepiness can suggest dehydration. Call your clinician promptly, especially for young babies.
Disposable vs cloth diaper changes: what’s different day to day
The Diaper change steps stay the same: safe setup, gentle cleaning, good drying, and a snug fit.
Day-to-day differences:
- Disposables usually wick moisture away and may keep the surface drier for longer.
- Cloth nappies vary by system and may need more frequent changes, especially without a stay-dry liner.
- With cloth, comfort depends on fit, absorbency (inserts/boosters), and a wash routine that removes urine and stool residue properly, insufficient washing can worsen irritation and smell.
Many families use a mixed routine (cloth at home, disposables outside or at night). It is practical.
Diaper change supplies: what to have within reach
Essentials checklist
Keep supplies within arm’s reach, so you do not step away.
- Clean diaper (correct size)
- Warm water + soft cloth/cotton, or fragrance-free wipes
- Changing pad/mat (wipeable)
- Small towel/cloth for drying
- Disposal bags and a lidded bin/diaper pail
- Barrier ointment if your baby tends to get rashes
Helpful extras (especially outside)
- Spare outfit
- Portable changing pad
- Hand sanitiser for outings (handwashing is best when available)
- For cloth: wet bag or pail liner
Choosing products for sensitive skin
When skin is reactive, fewer products often work better:
- Choose wipes labelled alcohol-free and unscented, avoid fragrance.
- Be cautious with essential oils and strongly scented baby products.
- If redness appears after a new wipe, cream, or detergent, stop it for a few days and return to basics (warm water + soft cloth, then a simple barrier).
Common barrier ingredients:
- zinc oxide
- petrolatum
Setting up a safe, simple diaper change space
Safe setup at home (organised station, ergonomics, easy-to-clean surfaces)
Choose a stable surface you can clean easily: a changing mat on a sturdy dresser, or a floor mat (often safest once rolling begins). Keep supplies organised so your hands stay free.
Your back matters. Repeated bending and twisting can add up. Sitting for a Diaper change, or using a surface at waist height, can reduce strain.
Safety basics (one hand on baby, never leaving baby unattended)
The main risk during a Diaper change is falls.
- Never leave your baby unattended on a raised surface.
- Keep one hand on your baby.
- Straps can help, but they never replace supervision.
If your baby is rolling, a floor change can be calmer and safer.
Hygiene routines
Wash hands before and after changes when possible. After poop or leaks, clean the surface. Keep creams and wipe packets closed so they do not dry out or collect dust.
How to change a diaper: gentle step-by-step
Before you start: prepare and help your baby feel secure
1) Gather supplies (diaper, wipes/cloth, disposal bag, barrier if needed).
2) Place baby on a stable surface, keep one hand on them.
3) Speak calmly and keep the routine predictable.
Remove, clean, and dry: pee vs poop
4) Open the diaper. Use the front of the dirty diaper to lift away the first mess.
After pee:
- Warm water on soft cotton is often enough.
- Gentle strokes, no scrubbing.
After poop:
- Remove the bulk first.
- Clean folds (buttocks, groin creases) gently but thoroughly.
- If the mess is large, a gentle, fragrance-free cleanser can help, then wipe away residue so none is left behind.
For girls: wipe front-to-back.
For boys: clean around the penis and scrotum, do not forget thigh creases.
Foreskin note: avoid forcibly pulling back the foreskin in infants. Non-retractability is commonly normal in early life (physiological phimosis). Clean only what you can see.
5) Pat dry, do not rub. Residual moisture plus friction is a common irritation trigger. A few seconds of supervised air time can help.
Protect skin and refasten (barrier cream, fit, tabs, leg cuffs)
6) If skin is red or your baby gets frequent rashes, apply a thin protective layer on clean, dry skin (zinc oxide paste or petrolatum). If irritation is more pronounced, a thicker visible layer can act like a protective dressing.
7) Slide a clean diaper under the bottom, bring the front up, fasten tabs evenly.
8) Pull leg ruffles out so cuffs seal, check there are no gaps.
9) Dispose the dirty diaper, then wash hands.
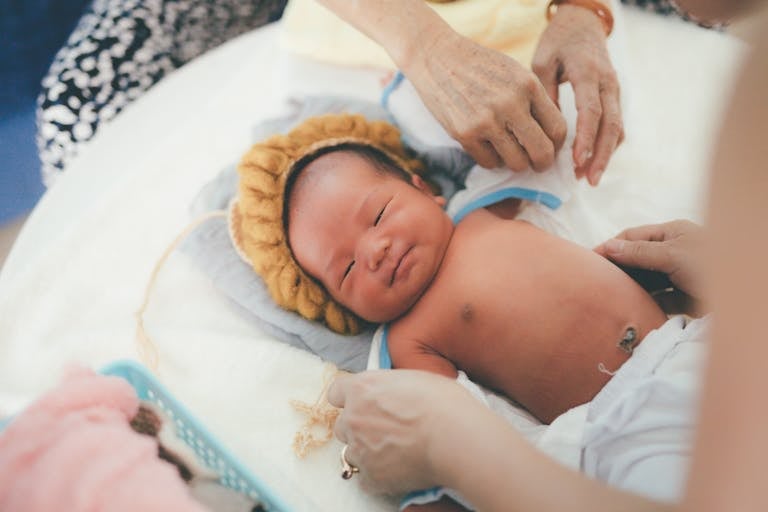
Newborn diaper changes: gentle care from day one
Umbilical stump and delicate skin
Keep the umbilical stump clean and dry. Use a diaper with a cord cutout, or fold the front waistband down so it does not rub. Avoid applying products to the stump unless your clinician advises.
Call your clinician if you notice increasing redness, swelling, oozing, or foul smell around the stump.
Meconium and early poop: removing sticky residue gently
Meconium (first dark, sticky stools) can smear. Warm water on a soft cloth is often gentler than repeated wiping. Clean thoroughly, pat dry, then consider a thin barrier layer.
Typical newborn frequency and fit tips
Newborns often need a Diaper change every 2-3 hours, adding up to about 8-12 diapers per day.
Fit check:
- snug but not tight (one finger under the waistband),
- persistent red marks or indentations mean loosen the fit or consider sizing up.
Toddler diaper changes: faster, safer, less wrestling
Wiggly toddlers: standing changes and distractions
If your toddler fights lying down, a standing change can work (only if your child is steady). Keep supplies ready, place one arm around the hips for stability, and distract with a small toy or a short song.
Building cooperation with routines and choices
Toddlers do better with predictability. Offer two small choices, like “blue diaper or green diaper”, and keep your voice calm and sentences short.
Fit, sizing and leak prevention
How to choose the right size (and when to size up)
Start with the brand weight chart, then adjust for your baby’s shape. If you are near the top of the range, seeing frequent leaks, or noticing persistent red marks, it is often time to size up.
Quick fit check
Most leaks come from fit:
- waistband snug but not tight,
- leg ruffles pulled out and sealing,
- diaper centred in the groin creases,
- no gaps at the back when your baby moves.
Too small causes marks and friction. Too large leaves thigh gaps.
Extra leak help
For longer stretches (overnight, long naps), use an overnight diaper or add a booster insert. Clothing that fits smoothly can also reduce shifting.
Skin care and diaper rash prevention
Everyday skin care during changes
Gentle cleaning plus proper drying prevents many rashes. Clean folds, pat dry, and allow brief supervised diaper-free time if redness is starting.
Barrier creams and ointments: which types and when you can skip them
- Zinc oxide: thicker, stronger barrier for active redness.
- Petrolatum: smoother, often useful for prevention and mild irritation.
You can often skip daily barrier if skin is healthy, Diaper change timing is regular, and your baby is not rash-prone. If irritation starts, use barrier consistently for a few days.
Diaper rash: common triggers, home care, and when to seek medical advice
Common triggers:
- prolonged moisture and friction,
- diarrhoea,
- fragranced products,
- diet changes that make stool more acidic.
Home care:
- more frequent Diaper change,
- gentle cleaning and careful drying,
- protective barrier,
- short supervised diaper-free time.
Seek medical advice if:
- rash lasts beyond 48-72 hours despite good care,
- there is oozing, bleeding, or ulcers,
- there are small red “satellite” spots around a bright red rash (often Candida/yeast),
- your baby has fever, seems unwell, or is in significant pain.
Diaper changes on the go: travel, car, and public restrooms
Pack a simple outing kit
- 2 diapers (more for long outings)
- Wipes or cloth + water
- Portable changing pad
- 2 disposal bags
- Spare outfit
- Small tube of barrier ointment
- Hand sanitiser
Changing safely outside
Choose flat and stable. In a car, park safely and use the back seat with a changing pad. In public restrooms, use a barrier pad and clean up after.
À retenir
- A prompt Diaper change after poop helps prevent inflammation because stool enzymes irritate quickly.
- Typical frequency: newborns often 8-12 changes per day, older babies and toddlers often every 3-4 hours while awake, plus after poops.
- Safety first: stable surface, supplies within reach, and one hand on your baby.
- Clean gently, wipe front-to-back, clean folds, and pat dry, zinc oxide or petrolatum can protect when redness starts.
- Get medical advice if wet diapers drop noticeably, stools look concerning (blood, black/tarry, pale/clay), or a rash is severe, persistent beyond 48-72 hours, oozing/bleeding, very painful, linked with fever, or has satellite spots.
- For extra support, you can download the Heloa app for tailored guidance and free child health questionnaires.

Further reading: