
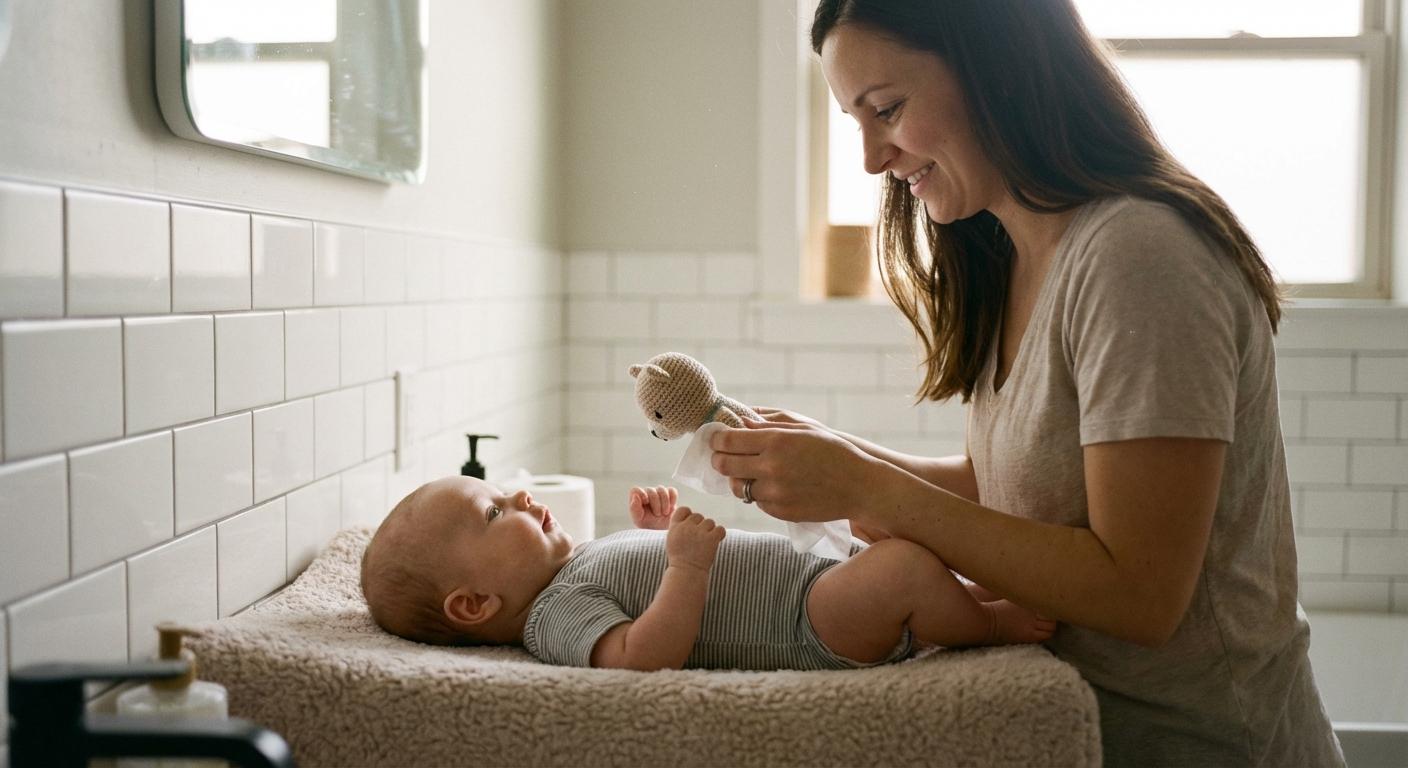
A Diaper change looks like a small task, but it quietly decides a lot: your baby’s comfort, sleep quality, skin barrier health, and how often you end up dealing with leaks or a stinging rash. Some days it’s smooth. Other days, the diaper is off, your baby is mid-roll, and you’re thinking, “Now what?”
A few science-backed basics make a Diaper change faster and kinder on the skin: prompt changes after stool, gentle cleansing (less rubbing, more efficiency), proper drying (especially folds), and a well-fitted diaper.
Diaper change basics parents can rely on
What a Diaper change includes (newborns, babies, toddlers)
A Diaper change is not only “remove and replace”. It usually includes:
- A quick skin check (redness, broken skin, small bumps)
- Cleaning urine/stool with minimal friction
- Drying properly (groin creases, buttock cleft)
- Putting on a fresh diaper with the right fit to prevent leakage and rubbing
Newborns need extra softness (and cord-stump care). Babies soon become strong wigglers, so safety and speed rise to the top. Toddlers may prefer standing changes and respond better when given simple choices.

Why timely changes support hygiene, comfort, and fewer infections
Urine and stool are different, but they share one big issue: moisture under occlusion. When skin stays damp, the outer protective layer (the stratum corneum) softens, this is maceration. Add heat and friction from elastics, and the skin becomes easier to irritate.
Stool is more aggressive because it contains digestive enzymes (proteases and lipases). It also alters local pH, making the area more prone to inflammation and germ overgrowth, including Candida (yeast). That is why the simplest high-impact rule holds true: after stool, do a prompt Diaper change.
Four anchors that make every Diaper change calmer
- Clean: Remove what’s needed, no scrubbing.
- Gentle: Fewer wipes, lighter pressure.
- Safe: One hand on your baby throughout (especially on a table).
- Predictable: Same order, same gestures, less resistance.
Key terms (wet diaper, poop diaper, blowout)
- Wet diaper: urine only. Wetness indicators help, but heaviness, swelling, and smell also matter.
- Poop diaper: stool present, change promptly.
- Blowout: stool escapes (often up the back or out the leg openings). Fit, fullness, and diaper cut are common causes.
Diaper change frequency and timing
Typical Diaper change frequency by age
Every baby is different, but patterns are familiar.
Newborns (0–3 months)
- Change after every poop.
- Change when the diaper is clearly wet/heavy.
- A practical routine: Diaper change before/after feeds (choose what suits your baby).
Older infants (3–12 months)
- Many families check every 2–3 hours in the day.
- Adjust based on naps, outings, absorbency, and skin sensitivity.
Solids and toddlers (6 months–2+ years)
- Stool can become bulkier or more irritating.
- Ensure the correct size, pull leg cuffs outward, and avoid tight clothing compressing the diaper.
Nighttime: when to change vs when to let sleep continue
At night, balance comfort with sleep.
- Poop: change quickly, stool irritation can escalate fast.
- Wet only: if baby is sleeping, there’s no leak, and skin looks fine, waiting till a natural waking or morning is often reasonable.
If there’s an active rash, a leak, or repeated night redness, a nighttime Diaper change may prevent a worse flare later.
Signs it’s time
- Wetness indicator changes colour
- Diaper feels swollen/heavy
- Stronger smell
- Leaks at thighs or up the back
- Fussiness, twisting, sudden discomfort
- Routine checks (before naps, before going out)
Wet diapers and hydration cues
Wet diaper counts can help you judge hydration along with feeding and behaviour.
- Day 1: about 1 wet diaper
- Day 2: about 2 wet diapers
- Day 3: about 3–4 wet diapers
- Day 4–5: about 4–6 wet diapers
- After milk supply is established (often day 4–7): typically about 6–8 wet diapers/day
- Older infants (around 6 months+): often around 4–6 wet diapers/day
If you notice fewer wet diapers than expected, very dark urine, dry mouth, no tears, or unusual sleepiness, especially during diarrhoea, speak to your paediatrician.
Diaper change supplies checklist (home-ready)
Diapers and fit basics (day vs overnight)
Choose size by weight range, then confirm fit on your baby.
- Waist: two-finger space under the waistband.
- Tabs even, diaper centred.
- Leg cuffs at the thighs should be pulled outward.
- Deep red marks, frequent leaks, repeated blowouts: consider changing size or brand.
- For sensitive skin, fragrance-free diapers without added lotions can help.
- For long stretches, an overnight/high-absorbency diaper may reduce leaks.
Wipes and gentle alternatives
- Urine only: warm water + cotton pads/soft cloth is often enough.
- Poop: warm water first, mild fragrance-free cleanser only if needed, then rinse.
- If using wipes, prefer alcohol-free, fragrance-free, sensitive-skin options.
Ask yourself: are you cleaning or rubbing? Friction can drive irritation more than leftover “dirt”.
For girls, always wipe front-to-back.
Creams and ointments (when they help)
Barrier products reduce contact with moisture.
- Zinc oxide paste: thick barrier, useful for typical diaper rash.
- Dimethicone barrier cream: forms a protective film.
- Petrolatum (petroleum jelly): gentle barrier, often used after circumcision to prevent sticking.
Healthy skin often needs very little. When skin turns pink/red, apply a visible layer, no aggressive massaging.
Changing surface essentials
- Flat stable surface (table or floor mat)
- Wipeable pad/waterproof liner
- Soft cloth for patting dry
Hand hygiene and disposal
- Soap and water after every Diaper change
- Sanitizer as backup when outside
- Lidded bin/diaper pail + disposal bags
Backup clothes and time-savers
Keep a spare outfit close by and in the diaper bag.
Small details that really help:
- A dedicated dry cloth for folds
- One diaper-only toy
- If baby arches, bring knees gently towards tummy (avoid pulling ankles)
Diaper change station setup (safe and practical)
Where to set up at home
A main station in your most-used room is practical. A smaller mini-kit elsewhere (diapers, wipes, bags, cream) reduces rushed runs.
A calming setup
Warmth and softer lighting reduce crying, especially during night changes. Keep supplies within arm’s reach.
Safety habits that prevent falls
- One hand on baby throughout the Diaper change
- Never step away, even for a second
- Straps are a backup, not a guarantee
How to do a Diaper change step by step
Before you start
Wash hands, protect the surface, and keep everything ready: clean diaper, wipes/water, drying cloth, cream if needed, disposal bag.
Open and remove smoothly
Open the diaper, keep one hand on baby. If there’s stool, use the front of the dirty diaper to wipe bulk, then fold it inward.
Clean without irritation
- Clean gently, front-to-back
- Focus on creases (groin folds, buttock cleft) without repeated rubbing
- Use a fresh wipe/cotton for each pass when possible
Dry thoroughly
Pat dry, especially folds. A clean diaper over damp skin increases maceration and rash risk.
Protect when needed, then refit
- Healthy skin: often no cream
- Pink/red skin: barrier layer, visible, not rubbed in
Fasten evenly, check waist, and pull leg cuffs outward.
Finish
Dispose safely, wipe the surface if soiled, and wash hands for at least 20 seconds.
Newborn Diaper change: special considerations
Umbilical cord care
Keep stump clean and dry. Fold the diaper down (or use a notched newborn diaper) to avoid rubbing. Seek advice if redness spreads, swelling appears, foul smell, or discharge is seen.
Meconium clean-up
Meconium is dark, sticky, and can take a few gentle passes. Warm water + cotton/soft cloth may feel better than repeated wiping, then pat dry.
Sensitive newborn skin
Newborn skin is thinner and reactive. Plain warm water often works well, keep products minimal.
Frequent stools
If stools are frequent, irritation may come from repeated wiping + moisture.
- Clean gently
- Pat dry
- Use a barrier layer early if redness starts
- Short supervised diaper-free time can help
Diaper change tips for girls and boys
Baby girls
Always wipe front-to-back. Clean folds gently, then pat dry. This reduces the chance of bacteria moving towards the urethra.
Baby boys
Cool air can trigger urination. Keep a cotton pad/cloth near the lower belly, or place the clean diaper loosely for a few seconds. Before fastening, point the penis downward to reduce leaks.
Uncircumcised penis
Do not pull back the foreskin. Clean only what you can see. Forced retraction can cause tiny tears and increase infection risk.
After circumcision
Follow your clinician’s instructions. Often, a thin petrolatum layer prevents sticking. Seek advice for increasing redness, swelling, pus-like discharge, fever, or bleeding that doesn’t stop with gentle pressure.
Positions and techniques by stage
On-the-back changes
Most common. Keep your steps predictable, a calm voice and a small distraction can help.
Standing changes for toddlers
Some toddlers cooperate better standing.
- Support at the waist
- Keep it quick
- Consider pull-ups for urine-only changes
Wiggly baby strategies
Prepare the clean diaper first. Keep the routine short, but not rushed. Consistency reduces resistance.
Diaper change and diaper rash prevention
Why rashes happen
Most diaper rashes are irritant contact dermatitis: moisture + friction + irritants. Tight fit, scented products, and vigorous wiping can worsen it. Diarrhoea is a common trigger.
A skin-friendly routine that often helps within 24–48 hours
- Temporarily increase Diaper change frequency
- Simplify cleaning (warm water + cotton/soft cloth)
- Pat dry carefully, especially folds
- Apply a thicker barrier (zinc oxide or dimethicone) on red areas
Yeast rash vs irritant rash (how they look)
- Irritant rash: red areas where diaper touches, folds may look less involved, often improves with frequent changes + barrier paste.
- Candida rash: bright red, often involves folds, with small “satellite” bumps, may need antifungal treatment prescribed/advised by a clinician.
Common mistakes that keep irritation going
- Leaving baby unattended even briefly
- Diaper too tight (marks, rubbing) or too loose (leaks)
- Forgetting folds
- Layering many products (more friction/occlusion, more irritation)
Nighttime Diaper change that supports sleep
Poop vs wet diaper choices
Poop: Change quickly. Wet-only: If no leak and skin is stable, waiting can protect sleep.
Low-stimulation tips
Dim light, minimal talking, supplies ready. Smooth steps help baby settle again.
Leak prevention overnight
Overnight diapers, correct sizing, and checking leg cuffs help. If leaks persist, some babies do better with a size-up at night.
Diaper change away from home and in group care
Outings
Carry a compact kit: changing mat, 2–3 diapers, wipes or cotton + water option, barrier cream, disposal bags, spare clothes, sanitizer. Always create a clean barrier on public surfaces.
Daycare/shared caregiving
If skin is sensitive, share your preferred products and clear instructions (for example: barrier paste only if redness starts). Consistency keeps skin steadier.
Diaper change hygiene and cleaning routines
Handwashing
Soap and water for at least 20 seconds after every Diaper change. Sanitizer helps when outside, then wash properly later.
Cleaning surfaces
Wipe with soap and water after messes. Disinfect hard surfaces as per product directions, including contact time.
Laundry after blowouts
Remove solids, rinse, pre-treat, then wash with the hottest water safe for fabric. Extra rinse helps reduce residue.
Disposable, cloth, and mixed routines
Disposable diapers
Very absorbent, but leaks still happen with wrong size, uneven tabs, tucked-in cuffs, or tight clothing.
Cloth diapers
They work well for many families, but need good routines: regular changes, thorough drying, and well-rinsed washing (detergent residue can irritate).
Mixed approach
Cloth at home and disposable at night/outings is common and practical.
Health signs to notice during a Diaper change
A Diaper change is also a small health check.
Seek medical advice if you notice:
- Fever (especially under 3 months)
- Blood in stool or urine
- Persistent vomiting, poor feeding
- Dehydration signs (fewer wet diapers, dark urine, dry mouth, no tears, unusual sleepiness)
- Rash that spreads, oozes, bleeds, blisters, looks very painful, or does not improve with good care
To remember
- After stool, a prompt Diaper change protects skin from enzymes and irritation.
- Gentle cleansing and thorough pat-drying (especially folds) reduce rash risk.
- Fit checks matter: two-finger waistband space and leg cuffs pulled out.
- At night, wet-only diapers can sometimes wait if baby is sleeping, skin is calm, and there’s no leak.
- If rash persists, looks like yeast (folds + satellite bumps), or your baby shows fever/dehydration signs, get medical advice.
- Support is available, and you can download the Heloa application for personalised guidance and free child health questionnaires.
Further reading: