A diaper change can feel like a small task that repeats all day—until your baby develops redness, wakes more at night, or you notice leaks every other hour. Then the details matter: moisture, friction, stool enzymes, and the way the diaper seals around the thighs. A steady diaper change routine protects comfort, supports the developing skin barrier, and helps you notice early signs of irritation before they escalate.
Diaper change basics every parent can master
What a diaper change is and why it matters (comfort, skin, hygiene)
A diaper change is more than swapping a diaper. It is repeated care for a sensitive area that sits in warmth and humidity, exposed to urine and stool many times a day. In newborns, the outer layer of skin (stratum corneum) is still maturing, water passes through more easily, the skin inflames faster, and healing may take longer.
A good diaper change rests on three simple actions:
- gentle cleaning
- careful drying
- protection only when needed
Each diaper change is also a quick check-in. Look out for persistent redness, swelling, tiny bumps, oozing, bleeding, blood in stool, or unusual discharge.

Why poop irritates so quickly (enzymes, humidity, friction)
Poop is chemically active. Stool contains digestive enzymes (lipases and proteases). When enzymes sit on damp skin under a diaper—plus warmth and rubbing—irritation can appear quickly. That is why a prompt diaper change after poop, cleaning skin folds, and drying without scrubbing can change the whole day.
Full change vs quick freshen-up
A full diaper change is best when:
- there is poop
- the diaper feels heavy or very wet
- there is leakage
- the skin looks red or sore
A quick freshen-up can work when the diaper is only slightly damp, the skin looks calm, and you mainly need to refit or wipe a small area. If you see stool, redness, or a strong smell, plan a full diaper change soon.
Turning diaper changes into a calmer routine
Babies pick up patterns. Same place, same sequence, same short phrase. Predictability often reduces crying. A calm voice and steady hands usually matter more than doing extra.
When to do a diaper change (and how often)
Newborn frequency (including meconium days)
In the first weeks, many babies need a diaper change every 2–3 hours and after each poop. In many Indian homes, babies may be wrapped warmly, and the diaper area can get humid faster—so frequency can matter.
It is common to use around 10–12 diapers a day early on, though some babies may be closer to 6–10 changes in 24 hours. Feeding type, stool pattern, age, and room temperature all play a role.
During meconium days (usually the first 1–2 days), stools are sticky and frequent. A quick diaper change after each poop helps protect the skin.
How to tell a diaper is wet or dirty (even without smell)
A diaper does not need to smell to be saturated. Look for:
- a heavy, swollen, or sagging diaper
- leaks at the back or thighs
- a wetness indicator line changing colour
- fussiness during contact
- redness appearing faster than usual
Do you need a diaper change after every pee? Not always—modern diapers absorb well. But if your baby’s skin gets red easily, shorter intervals often help.
Before or after a feed: how to choose
- Change before feeding: baby may settle better, less chance of spit-up during the change.
- Change after feeding: helpful if baby often poops during or right after feeds.
Some parents like: half-feed → diaper change → finish feeding.
Night changes: protect skin without sacrificing sleep
At night, aim for balance.
- If baby is sleeping deeply and the diaper is only wet with no leaks, you usually do not need to wake them every time.
- If there is poop, a blowout, obvious discomfort, or significant redness, a diaper change is worth it.
- During a night feed, a quick check is often enough.
Keep lights dim and interaction minimal.
Diaper change supplies to gather first
Safe changing setup (table, pad, warm room, storage)
Choose a stable surface with a wipeable changing mat. If you use a changing table, guardrails and straps help, but do not rely on them alone. A floor setup on a clean mat is often easier once rolling begins.
Keep the room comfortably warm. Arrange supplies in a basket so you never need to step away mid–diaper change.
Essentials checklist
- clean diaper (correct size)
- wipes or warm water + soft cloth (often best with fragrance-free wipes)
- a small towel to pat dry
- barrier product if needed
- disposal bags or diaper pail
- spare outfit
Cleaning options: warm water, cotton/cloth, wipes
For urine-only changes, warm water with cotton or a soft washcloth is often enough.
Wipes are convenient when you are out, choose alcohol-free and fragrance-free options if your baby’s skin reacts easily.
For poop, clean folds gently without rubbing back and forth. If stool is stuck, moisten, wait a few seconds, then wipe with minimal friction.
Skin products (what they do, and when less is more)
If skin looks healthy, multiple products rarely add benefit.
If redness is starting or stools are frequent, barrier care can help:
- Zinc oxide paste forms a thicker shield for more pronounced redness.
- Petrolatum ointment (petroleum jelly) reduces friction and moisture contact.
If a product stings, worsens redness, or causes bumps, simplify: warm water cleansing, careful drying, then a basic barrier if needed.
On-the-go kit (portable pad, sanitizer, wet bags)
- portable changing mat
- 2–3 diapers
- travel wipes or cotton + small water bottle
- disposal bags and a wet bag for soiled clothes
- hand sanitiser (then wash hands later)
- one spare outfit
Diaper change safety and hygiene habits
Keeping baby safe (one hand on baby, never step away)
Most diaper-change injuries are falls. Keep one hand on baby at all times on elevated surfaces. If you forgot something, pick baby up and take them with you.
Once rolling starts, a floor diaper change is usually the safest.
Clean hands, clean surfaces, sensible disposal
Wash hands before and after.
Wipe the changing mat regularly, especially after stool leaks. Seal dirty diapers in a bag or pail. Do not flush diapers or wipes.
Avoid talc powders, fine particles can be inhaled and irritate a baby’s airway. Barrier ointment or paste is safer.
How to do a diaper change step by step (disposable)
1) Prepare a calm, safe change
Place baby on the mat, keep one hand on them, and open the clean diaper in advance.
2) Prevent surprises (pee shield)
Open tabs and fold the dirty diaper front down.
For boys, cool air can trigger reflex urination. Cover the penis with a wipe/cloth or the front of the clean diaper for a few seconds as a pee shield.
3) Remove the dirty diaper without spreading mess
Use the front of the diaper to remove the bulk, then fold the dirty diaper under the bottom. To lift hips, hold ankles gently, or roll baby slightly to the side.
4) Clean gently and thoroughly (folds matter)
Work from the cleanest area to the dirtiest.
- Girls: wipe front-to-back to reduce bacteria moving towards the vulva/urinary opening, clean labial folds gently.
- Boys: clean penis and scrotum gently, then groin folds, avoid harsh rubbing.
5) Dry without rubbing, then let the skin breathe if you can
Wet skin breaks down faster. Pat dry with a soft towel, or allow brief air-dry.
6) Apply protection only if needed
If skin looks normal, cream every time is not required.
If you see redness, frequent stools, night-time dampness, or past rashes, apply a thin barrier. For stronger redness, a thicker zinc oxide paste offers more shielding.
7) Put on the clean diaper and check the fit
Slide the clean diaper under baby, bring the front up, and fasten tabs evenly.
Aim for snug, not tight:
- one finger fits under the waistband
- pull leg cuffs outward so they seal
- keep the diaper centred
For boys, point the penis downward to reduce leaks.
If an umbilical stump is still present, fold the waistband down below the stump.
8) Finish up
Seal and discard the diaper, wipe the surface if needed, and wash hands.
Newborn diaper change: what is different in the first weeks
Umbilical cord stump-friendly diapering
Keep the stump clean and dry. Seek medical advice if you notice increasing redness, swelling, oozing, foul smell, or fever.
Meconium cleanup tips
Meconium sticks. Warm water on a soft cloth helps lift it without rubbing. Dry well afterwards. If irritation starts easily, a thin barrier layer before the next stool can make the next diaper change easier.
Night-time newborn changes
Low light, minimal talking. Many parents prefer diaper change before feeding, or mid-feed, then keep the second half quiet.
Diaper changes with a wiggly baby or a resistant toddler
Safer positions when rolling starts
If baby rolls or twists, the floor is usually safest. On a changing table, keep supplies within reach.
Keeping baby calm (simple, repeatable strategies)
Use a predictable sequence. Offer one distraction and keep the diaper change efficient.
Toddler changes without power struggles
Offer small choices (which diaper, standing or lying). Standing changes can work for pee-only, for poop, lying down is often cleaner.
Diaper fit and sizing to prevent leaks
How to choose the right size
Use the pack’s weight range as a starting point. If baby is near the top of a size and leaks are frequent, sizing up often helps.
Too small: tight waistband, red marks, frequent leg leaks.
Too big: gaps, sagging.
Fit checklist
- one-finger test at the waist
- diaper centred front-to-back
- leg cuffs pulled outward
- tabs fastened symmetrically
Diaper rash and diaper changes: prevention and care
Everyday prevention at each change
Gentle clean, thorough dry, barrier when needed. Quick diaper change after poop matters more than hard wiping.
Common triggers for redness
- diaper changes spaced too far apart
- diarrhoea or acidic stools
- friction from poor fit
- diet changes when starting solids
- frequent stools during stomach bugs or after antibiotics
Choosing barrier products (petrolatum vs zinc oxide)
A petrolatum ointment often works for daily prevention and mild irritation.
A zinc oxide paste forms a thicker barrier for more pronounced redness. Apply on dry skin.
When to seek medical advice
Seek medical advice if a rash lasts more than 2–3 days despite good hygiene and barrier care, or if it spreads, oozes, bleeds, or looks painful.
Yeast (Candida) often looks bright red with sharp borders and small satellite lesions, especially in folds, an antifungal cream may be needed.
Seek advice promptly for blood in stool, black/tarry stools, persistent watery diarrhoea, signs of dehydration (fewer wet diapers, very dry mouth), or fever in a young baby.
Diaper changes in real life: night, travel, and public restrooms
Public restrooms and travel
Use a portable mat to cover surfaces. Seal waste in a bag, and clean your hands afterwards. A car boot area or a flat bench can work if it feels stable.
Cloth vs disposable diaper change routines (optional)
Cloth basics
Prefolds, fitteds, pockets, all-in-ones (AIOs), hybrids: the main idea is the same—replace the wet layer, keep the cover clean, and store soiled diapers in a wet bag or pail liner.
Key takeaways
- A diaper change protects comfort and helps prevent prolonged dampness and diaper dermatitis.
- Prepare supplies first and keep one hand on baby on elevated surfaces.
- Clean gently, dry thoroughly, and use a barrier only when skin needs it.
- Prompt diaper change after poop matters most.
- Fit prevents leaks: centred diaper, leg cuffs out, tabs even, snug waist.
- Seek medical advice for rashes lasting > 2–3 days, yeast-like patterns, spreading/oozing/bleeding rash, fever in a young baby, dehydration signs, or concerning stools.
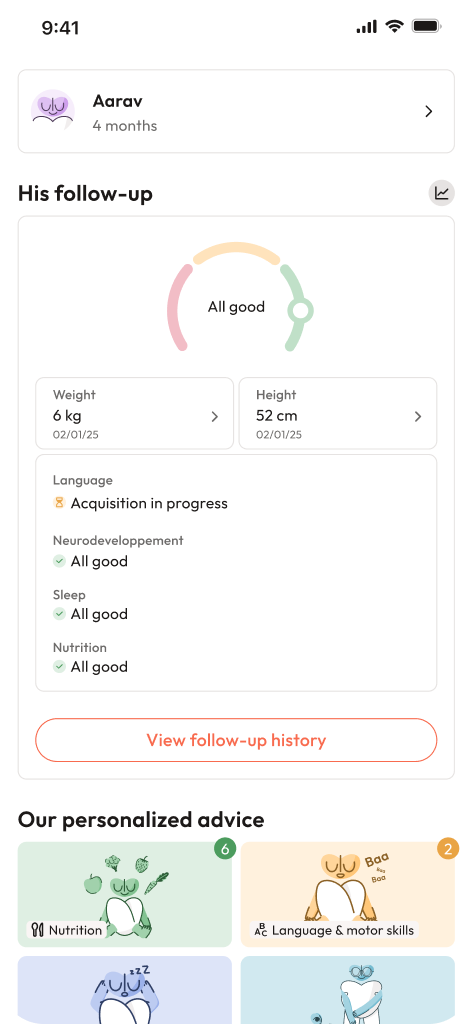
- For personalised tips and free child health questionnaires, you can download the Heloa app.

Further reading :
- Healthy Habits: Diaper Changing at Home: https://www.cdc.gov/hygiene/about/healthy-habits-diaper-changing-steps-at-home.html
- How to Change a Diaper: https://doh.wa.gov/sites/default/files/legacy/Documents/8330/130-082-DiaperCCsm-en-L.pdf