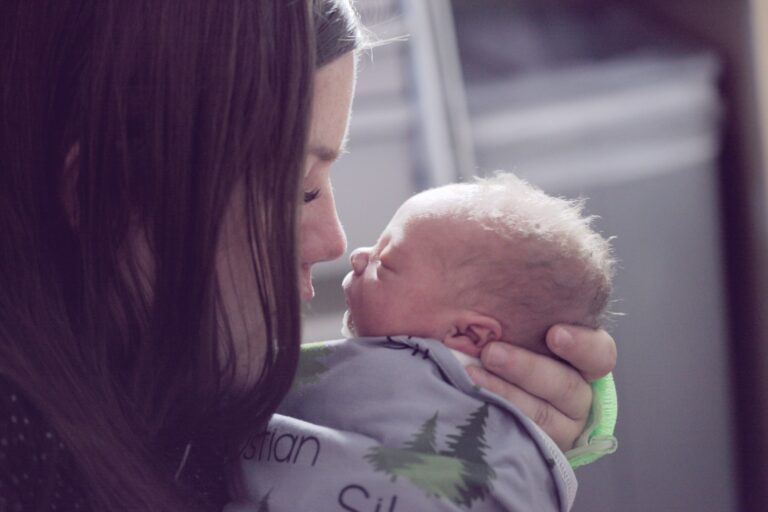
Earwax can look surprising on a tiny ear. A yellow smear at the canal entrance, a damp crease behind the ear, a little crust after milk dribbles—suddenly you’re wondering whether you should “clean better,” clean more often, or do nothing at all. With cleaning baby’s ears, the safest approach is also the simplest: gentle care of the parts you can see, and leaving the ear canal to do its own job.
You may be asking: what is normal earwax (cerumen), what is too much, and when should a clinician take a look? Let’s go step by step—practical techniques first, then the medical “why,” plus clear signs that deserve a check.
Cleaning baby’s ears at a glance: what parents can do safely
What to prepare for a calm, safe clean
Pick a moment when your baby is settled—often after a bath, when wax and skin residue are softer. Lay out:
- Warm water (test on your wrist)
- A soft washcloth or cotton pad
- Optional: sterile gauze for tight creases
- A dry towel for pat-drying
Keep everything close. With babies, the “one second I’ll grab the towel” moment is when sudden head turns happen.


Where to clean: only what you can see
For cleaning baby’s ears, stay with the visible skin:
- The outer ear (pinna)
- Small folds and creases where sweat, lint, milk, or cream collect
- The skin behind the ear (a warm, damp groove that can irritate easily)
- The very entrance of the ear canal only if wax is clearly on the surface
A simple rule works well: if you can’t see it, don’t clean it.
When to pause and try later
If your baby stiffens, cries, or keeps turning the head, stop. Forcing “quick cleaning” raises the risk of slipping and scratching delicate skin. Also pause if you notice:
- Marked redness or swelling
- Tenderness when touched
- Any drainage (clear, yellow, or bloody)
Those aren’t good moments for cleaning baby’s ears, they’re signs to observe and, if they persist or worry you, to seek medical advice.
Understanding baby earwax (cerumen) before you clean
Baby ears are not tiny adult ears
An infant ear canal is short and narrow, lined with thin, sensitive skin. The tympanic membrane (eardrum) sits relatively close. That anatomy matters: a small inward movement plus a sudden startle can cause a scratch—or worse.
This is why safe cleaning baby’s ears means staying outside.
What earwax does (and why it’s not “dirt”)
Cerumen is a mix of skin cells, fatty secretions, and tiny hairs. It:
- Lubricates the canal (less friction)
- Traps dust and particles
- Supports the ear’s natural antimicrobial defenses
Even better: the ear has a self-cleaning system. The skin of the canal slowly migrates outward, and jaw movement (feeding, babbling, later chewing) helps wax drift toward the opening. In many babies, the best “deep clean” is… no deep clean.
Normal earwax vs a buildup that may cause trouble
Earwax color ranges from pale yellow to brown, texture can be dry or sticky. Both can be normal.
Buildup becomes more concerning when it seems to block the opening repeatedly or when symptoms appear. Babies won’t say “my ear feels full,” so you’ll notice behaviors instead:
- Irritability when the ear is touched
- Increased fussiness during feeding (pressure changes can feel odd)
- Seeming less responsive to sound or familiar voices
These signs don’t prove a wax plug, but they justify a look.
Outer ear vs ear canal: what’s safe at home
The outer ear is regular skin—gentle wiping is fine. The ear canal is different: delicate, narrow, and easily injured. Putting anything inside can:
- Scratch the canal and cause bleeding
- Push wax deeper and create impaction (a compact “plug”)
- Irritate skin and trigger otitis externa (inflammation of the ear canal)
- In rare cases, injure the eardrum
So, for cleaning baby’s ears, the canal stays off-limits.
When cleaning helps (and when less is better)
As-needed wiping vs routine “deep cleaning”
It helps to clean when you see residue:
- Visible wax at the entrance
- Dried milk behind the ears
- Sweat and lint in creases
Routine “inside cleaning” isn’t needed and can backfire.
Why baby earwax often clears by itself
Because wax is designed to move outward, it frequently reaches the entrance on its own—then it can be wiped away during normal washing. Minimal intervention often means fewer problems.
When home cleaning becomes counterproductive
Overdoing cleaning baby’s ears can:
- Compact wax deeper (making removal harder)
- Strip protective wax, leaving skin dry and itchy
- Increase irritation and inflammation risk
If you’re seeing more redness and more wax after frequent cleaning attempts, that pattern is a clue to scale back.
Safety rules for gentle ear care
Keep the ear canal off-limits
Nothing goes into the ear canal:
- No cotton swabs
- No fingers
- No “ear tools”
Repeat the core principle of cleaning baby’s ears: clean only what you can see.
Cotton swabs: why they’re risky (even “baby” swabs)
Swabs may pick up a little wax at the entrance, but they often push the rest inward, encouraging a plug. Add a sudden head turn, and the canal skin can be scratched. “Guarded” baby swabs still compress wax and can irritate.
Avoid improvised objects and ear candles
Rolled tissues, tweezers, curettes bought online—these can cause micro-injuries and raise infection risk. Ear candles add burn risk and have no solid evidence of benefit.
Avoid irritating liquids unless prescribed
Alcohol, hydrogen peroxide, antiseptics, and essential oils can sting or burn delicate skin. Home irrigation in infants is also unsafe: you can’t verify the eardrum is intact, and pressure can hurt.
Best methods parents can use at home
Warm, damp washcloth (outer ear only)
This is the workhorse method for cleaning baby’s ears. Wring the cloth well so water doesn’t drip toward the canal. Use light, short wipes.
Sterile gauze or cotton pad for folds (saline for skin residue)
For narrow creases, sterile gauze is handy and less linty. You can moisten it with saline (salt water used for gentle skin cleansing) to soften dried milk or cream on the skin.
Important nuance: saline helps residue on skin, it won’t “unblock” a true wax plug deeper inside.
Wiping visible wax at the entrance—without digging
If wax is clearly sitting right at the opening, wipe outward. No hooking, scooping, or trying “just a bit further.” If it doesn’t come away easily, stop and try another day.
Drying well to prevent moisture irritation
Skin behind the ear can macerate (soften and break down) when it stays damp. After cleaning baby’s ears, pat dry:
- Outer ear
- Creases
- Behind-the-ear fold
Step-by-step: how to clean baby ears safely
1) Set up safely
Choose a stable surface and good light. Keep one hand supporting the head.
2) Clean the outer ear (pinna)
Use gentle wipes—no scrubbing. Skin there is delicate.
3) Clean folds and creases briefly
Trace the folds with a damp cloth, cotton pad, or moistened gauze. Short movements reduce friction.
4) Clean behind the ear
Milk, drool, and sweat collect here. Wipe gently, then dry well.
5) Clean only what’s visible at the entrance
If something is visible on the surface, wipe it away. If it’s not visible, leave it.
6) Aftercare: watch the skin
Over the next day, look for increasing redness, a new rash, tenderness, or your baby reacting more when the ear is touched.
Common situations: what to do (and what to avoid)
Visible wax at the entrance
- Do: wipe what is visible with warm water or saline on gauze.
- Avoid: trying to grab wax deeper.
Crusts around the ear or behind the ear
Crusts may be dried milk, dermatitis, or irritated skin.
- Do: soften first by holding a moistened pad on the crust for a few seconds.
- Avoid: scratching or picking, which can create tiny skin breaks.
Sensitive skin, dermatitis, or eczema behind the ears
Less rubbing is better. Gentle cleansing, careful drying, and minimizing friction help. If the skin becomes oozing, very painful, or develops honey-colored crusts, seek medical advice.
Water in the ear after bathing
Tilt the head to the side and let water drain naturally. Towel-dry the outer ear only. Do not insert anything to “soak up” water. If pain, redness, drainage, or fever appears afterward, get medical advice.
Oils and “baby ear sprays”: be cautious
Some products aim to soften wax. In young babies, avoid putting anything into the canal without a clinician’s guidance because suitability depends on the ear canal skin and eardrum status.
How often to clean and how to avoid overdoing it
A practical rhythm
Many families do well with:
- A gentle wipe of the outer ear during bath time
- Quick behind-the-ear care as needed (drool, milk, heat)
More frequent cleaning baby’s ears does not equal “cleaner”—it can mean drier, irritated skin.
Let observation guide you
There’s no perfect schedule. Use what you see:
- 0–3 months: outer ear and behind the ears as needed, entrance only if something is visible, often once or twice a week.
- 3–12 months: same idea, bath-time wipe, plus as-needed.
- After 1 year: still mostly outside-only cleaning.
Signs you may be cleaning too often
Watch for:
- Redness
- Flaking or dryness
- Small cracks
- Baby seeming bothered when you touch the ear
That’s often a sign to reduce friction and simplify the routine.
Signs of earwax buildup and other ear problems
Possible wax plug (impaction)
A plug may look like compact wax filling the opening. Possible clues:
- Changes in responses to sound
- More fussiness after a bath (wax can swell with water)
Ear pulling and fussiness: not always an ear infection
Ear touching can be exploration, teething, or tiredness. Look at the whole picture: fever, worsening night discomfort, obvious pain when the ear is touched, strong odor, or drainage deserves a check.
Odor, marked redness, pain, drainage, or fever
Earwax alone should not cause strong odor or significant pain. Concerning signs include:
- Hot, swollen, or very red ear
- Drainage (clear, yellow, green, or bloody)
- Fever
- Persistent crying with ear handling
At that point, cleaning baby’s ears is not the solution, assessment is.
When to see a pediatrician
Persistent wax you can’t remove from the outside
If wax keeps returning at the entrance, seems to block the canal, or you’re worried about hearing, your pediatrician can examine the ear with an otoscope and decide if removal is needed.
Seek prompt care for red flags
Seek medical advice promptly if there is:
- Pain or crying when the ear is touched
- A red, hot, swollen ear
- Drainage, bleeding, or a strong/unusual odor
- Fever
- Hearing seeming worse after a cleaning attempt
- Concern that something entered the ear canal
Professional ear cleaning for babies: what to expect
Why clinicians handle ear canal cleaning
If wax is impacted or symptoms suggest blockage, a clinician can look directly at the canal and eardrum and remove wax safely under vision.
How a wax plug may be removed
Depending on age and situation, removal can include:
- Gentle suction
- A medical curette under direct view
- Irrigation with appropriate equipment (only when suitable)
- Wax-softening drops prescribed beforehand in some cases
Key takeaways
- Earwax (cerumen) is normal and protective, baby ears often self-clean.
- The safest cleaning baby’s ears stays on the outer ear, folds, and behind the ear, nothing goes into the ear canal.
- Warm water, a soft cloth, optional sterile gauze for creases, and careful drying are usually enough.
- Cotton swabs (even baby versions), tools, ear candles, and irritating solutions increase blockage and injury risk.
- Pain, marked redness, fever, drainage, strong odor, or suspected hearing changes need medical advice.
- For reassurance, symptom checkers and child health questionnaires can help: you can download the Heloa app for personalized guidance and free child health questionnaires.
Questions Parents Ask
Can teething cause more earwax or ear pulling?
Yes—many babies tug at their ears while teething because jaw and gum discomfort can “radiate” around the ear area. That can look like an ear problem even when the ear is fine. Earwax production itself doesn’t reliably increase with teething, so a bit more touching doesn’t necessarily mean more wax. If your baby is otherwise well (no fever, no unusual discharge), it’s often reassuring to monitor and keep ear care gentle and external only.
Is flaky skin behind the ear normal, and what can help?
It’s quite common to see flaky or slightly red skin behind the ears, especially with drool, milk, sweat, or cradle cap. You can soften residue with warm water, then pat dry carefully. If the skin looks very dry, a thin layer of a fragrance-free emollient on the outer skin (not in the canal) can be soothing. If you notice oozing, worsening redness, an unpleasant smell, or your baby seems painful when touched, a clinician can check for irritation or infection and suggest the right treatment.
When is earwax “too much” if my baby seems to hear less?
If you’re noticing reduced responses to familiar voices or sounds over several days, it’s worth a pediatric check—earwax can block the canal, but so can fluid behind the eardrum after a cold. The good news: both are common and manageable. A quick otoscope exam can clarify what’s going on and whether any safe removal is needed.

Further reading: